Table of Contents
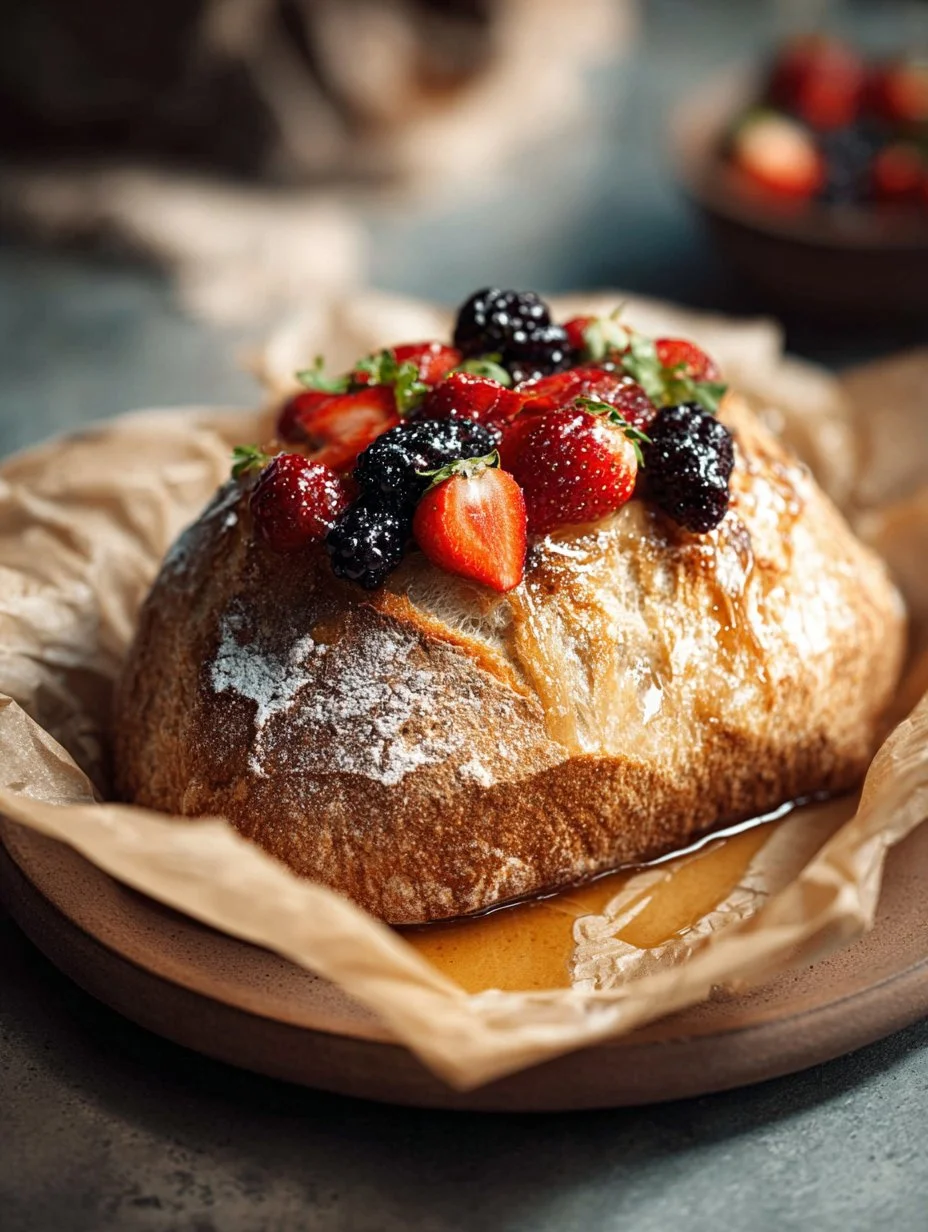
There’s something undeniably magical about fresh bread emerging from the oven, especially when it’s no-knead bread. My first experience with Miracle No-Knead Bread left me in awe of how effortlessly delicious homemade bread could be. This recipe requires minimal effort yet yields a beautiful loaf with a crusty exterior and a warm, soft interior a true marvel in the kitchen!

Why Choose This Recipe
Choosing to make Miracle No-Knead Bread unleashes a world of flavor and texture into your meals. With just four simple ingredients, this bread showcases the simplicity of traditional baking. Unlike conventional kneading methods, this recipe focuses on time and patience to create a wonderfully airy loaf.
For more delicious quick meals, check out our Dinner category.
Flavor & Texture
The flavor profile of this No-Knead Bread is rustic and hearty, with a crunchy crust that gives way to a tender interior. The slow fermentation process allows the dough to develop deep, rich flavors that make each bite memorable. The chewy crust contrasts beautifully with the light and airy crumb inside, bringing a delightful experience to your palate.
Convenience & Time
One of the best parts about Miracle No-Knead Bread is its convenience. Despite the lengthy rising time, the actual hands-on preparation takes less than 30 minutes. This low-maintenance recipe is perfect for busy individuals who crave homemade bread without dedicating hours in the kitchen.
Diet-Friendly Options
This No-Knead Bread recipe is naturally vegetarian and can easily be adapted to meet gluten-free needs. Substituting regular flour with gluten-free all-purpose flour allows those with dietary restrictions to enjoy fresh-baked bread.
For more gluten-free options, explore our Gluten-Free category. To learn more about the benefits of whole-grain flours, visit EatingWell.
Optional: Cultural Background
Bread has been a staple food in many cultures for centuries, representing sustenance and comfort. This no-knead method is inspired by traditional European baking, which embraces simplicity and time to allow flavors to develop naturally.
Ingredients
- 3 cups all-purpose flour
- 1 1/2 teaspoons salt
- 1/2 teaspoon instant yeast
- 1 1/2 cups room temperature water
Step-by-Step Instructions
- In a large bowl, whisk together the flour, salt, and instant yeast until well combined.
- Add the water and stir with a wooden spoon until a sticky, shaggy dough forms. Do not knead.
- Cover the bowl with plastic wrap or a clean kitchen towel and let it rise at room temperature for 12–18 hours, until the dough has doubled and has bubbles on the surface.
- Preheat the oven to 450°F (230°C). Place a Dutch oven with its lid in the oven while preheating.
- Carefully remove the hot Dutch oven from the oven. Transfer the dough onto a floured surface and shape it into a round loaf.
- Place the dough into the hot Dutch oven. Cover with the lid and bake for 30 minutes.
- Remove the lid and bake for an additional 10–15 minutes, until the crust is deep golden brown.
- Remove the bread from the Dutch oven and cool on a wire rack for at least 1 hour before slicing.
Tips & Tricks for Success
- Use high-quality flour for the best results.
- Ensure your water is at room temperature for optimal yeast activation.
- Don’t rush the rising time; allow the dough to develop flavors.
Timing & Texture
The dough’s fermentation time may seem long, but it requires no active work after an initial mix. This unique fermentation method allows for a bubbly and soft crumb, creating a unique texture that will impress anyone who tries it.
Ingredient Swaps
- For added flavor, consider incorporating herbs like rosemary or thyme into the dry mixture.
- Substitute a portion of the all-purpose flour with whole-wheat flour for a different taste and added fiber.
Make it Fool-Proof
Measure your ingredients precisely and allow enough time for the dough to rise fully. No-knead bread is forgiving, but timing is key for achieving the best results.
Creative Variations
- Add dried fruits or nuts for a sweet or rustic twist.
- Experiment with different seasonings like garlic or cheese for extra flavor.
15-Minute Version
Unfortunately, the nature of no-knead bread relies on fermentation, so a true 15-minute version isn’t feasible. However, if you combine the ingredients and let the dough rise overnight, you can bake it the next evening, minimizing your kitchen work to about 30 minutes.
Healthy Option
For a healthier loaf, consider using whole-grain flour or incorporating seeds into the mix for a nutrient boost.
Pairings & Serving Suggestions
What to Serve With It
Miracle No-Knead Bread pairs well with:
- Soups and stews for a cozy meal.
- Cheese and charcuterie boards for a sophisticated appetizer.
- Salads, offering a perfect accompaniment.
Occasions & Presentation
This bread is excellent for gatherings, brunches, or as a warm gift to neighbors during the holidays. Presenting it on a rustic wooden board adds charm and invites your guests to dig in.
Storage & Make-Ahead Tips
To store, wrap the cooled bread in a clean kitchen towel or plastic wrap and keep it at room temperature for up to three days. For longer storage, consider freezing it sliced and sealing it in an airtight container.
Nutrition & Health Benefits
Homemade bread allows you to monitor ingredients closely, ensuring fewer preservatives and additives. Whole grains and seeds in the dough can provide beneficial nutrients like fiber, vitamins, and minerals.
Mistakes to Avoid
- Skipping the rising time can lead to denser bread.
- Adding too much flour may result in a dry loaf. The dough should be sticky!
Hosting & Presentation Tips
Serve Miracle No-Knead Bread warm with a side of whipped butter or olive oil for dipping. You can sprinkle fresh herbs on top for an elegant touch before baking.
FAQs
Q: Can I use active dry yeast instead of instant yeast?
A: Yes, just proof it in warm water before adding to the flour mix.
Q: What can I do if my dough doesn’t rise?
A: Ensure your yeast is fresh and that the dough is kept in a warm area.
Q: Can I make this bread without a Dutch oven?
A: You can use an oven-safe pot or even bake it on a baking stone with steam.
Q: How long does the bread last?
A: It stays fresh for about three days at room temperature; freeze for extended storage.
Personal Closing Thought + Call-to-Action
Making Miracle No-Knead Bread has been a delightful addition to my baking repertoire. I encourage you to try this easy recipe you won’t regret the wonderful aromas filling your kitchen! Share your baking experience with us or leave a comment below!
Print
Miracle No-Knead Bread
Discover the magic of homemade No-Knead Bread, featuring a crusty exterior and a soft, airy interior with minimal effort.
- Total Time: 60 minutes
- Yield: 1 loaf 1x
Ingredients
- 3 cups all-purpose flour
- 1 1/2 teaspoons salt
- 1/2 teaspoon instant yeast
- 1 1/2 cups room temperature water
Instructions
- In a large bowl, whisk together the flour, salt, and instant yeast until well combined.
- Add the water and stir with a wooden spoon until a sticky, shaggy dough forms. Do not knead.
- Cover the bowl with plastic wrap or a clean kitchen towel and let it rise at room temperature for 12–18 hours, until the dough has doubled and has bubbles on the surface.
- Preheat the oven to 450°F (230°C). Place a Dutch oven with its lid in the oven while preheating.
- Carefully remove the hot Dutch oven from the oven. Transfer the dough onto a floured surface and shape it into a round loaf.
- Place the dough into the hot Dutch oven. Cover with the lid and bake for 30 minutes.
- Remove the lid and bake for an additional 10–15 minutes, until the crust is deep golden brown.
- Remove the bread from the Dutch oven and cool on a wire rack for at least 1 hour before slicing.
Notes
Use high-quality flour and ensure your water is at room temperature for best results. Don’t rush the rising time.
- Prep Time: 15 minutes
- Cook Time: 45 minutes
- Category: Bread
- Method: Baking
- Cuisine: European
- Diet: Vegetarian
Nutrition
- Serving Size: 1 slice
- Calories: 120
- Sugar: 0g
- Sodium: 300mg
- Fat: 1g
- Saturated Fat: 0g
- Unsaturated Fat: 1g
- Trans Fat: 0g
- Carbohydrates: 25g
- Fiber: 1g
- Protein: 4g
- Cholesterol: 0mg
